
Guide to Elys Floor 107+ (Shoeless Shadow Combo) Build
By Mihealsick
v1.14 saw a huge buff to conventional defenses as compared to v1.09. Gone are the days that a single hit from a single enemy would crush any “fair” defensive build. Now with enough dismantles and gumption, you can actually survive a nonzero number of hits from most enemies.
In fact, with this build, that’s all you need to survive at a time: exactly one enemy attack. After you take damage from an enemy attack, you immediately heal yourself back to full hp before the next attack lands, allowing you to survive indefinitely against every enemy in the game except Iron and Magma Golems. And better yet, every time you take damage and heal back to full, the Vampiric set and Celestial set give you massive damage buffs.
How? It takes a few components to get there:
- A pretty big health pool. You don’t need to focus on it exclusively, but it needs to be big enough to take one critical hit from Death.
- Shadow set to turn your Lifesteal stat into Omni-Vamp.
- Penetration (Read: Shard of Power)
- You need your ((Malice Damage * Lifesteal * Healing Power) / 4) to equal the amount of damage you take from a single attack. It really doesn’t take much.
With all this setup, an enemy will attack you and you’ll hit them back with Malice right away. Your penetration lets (enough of your) Malice slip past the enemy’s armor, and Omni-Vamp triggers because you connected damage to health. You immediately heal an amount that scales to the damage you dealt, and if your coefficients are right then this will heal you back to full health before the next hit lands.
From there, you can capitalize on those damage exchanges to increase your damage output. Elys’s Vampiric set gives you power for healing, but Celestial gives you freeze atk elemental% for taking damage as well!
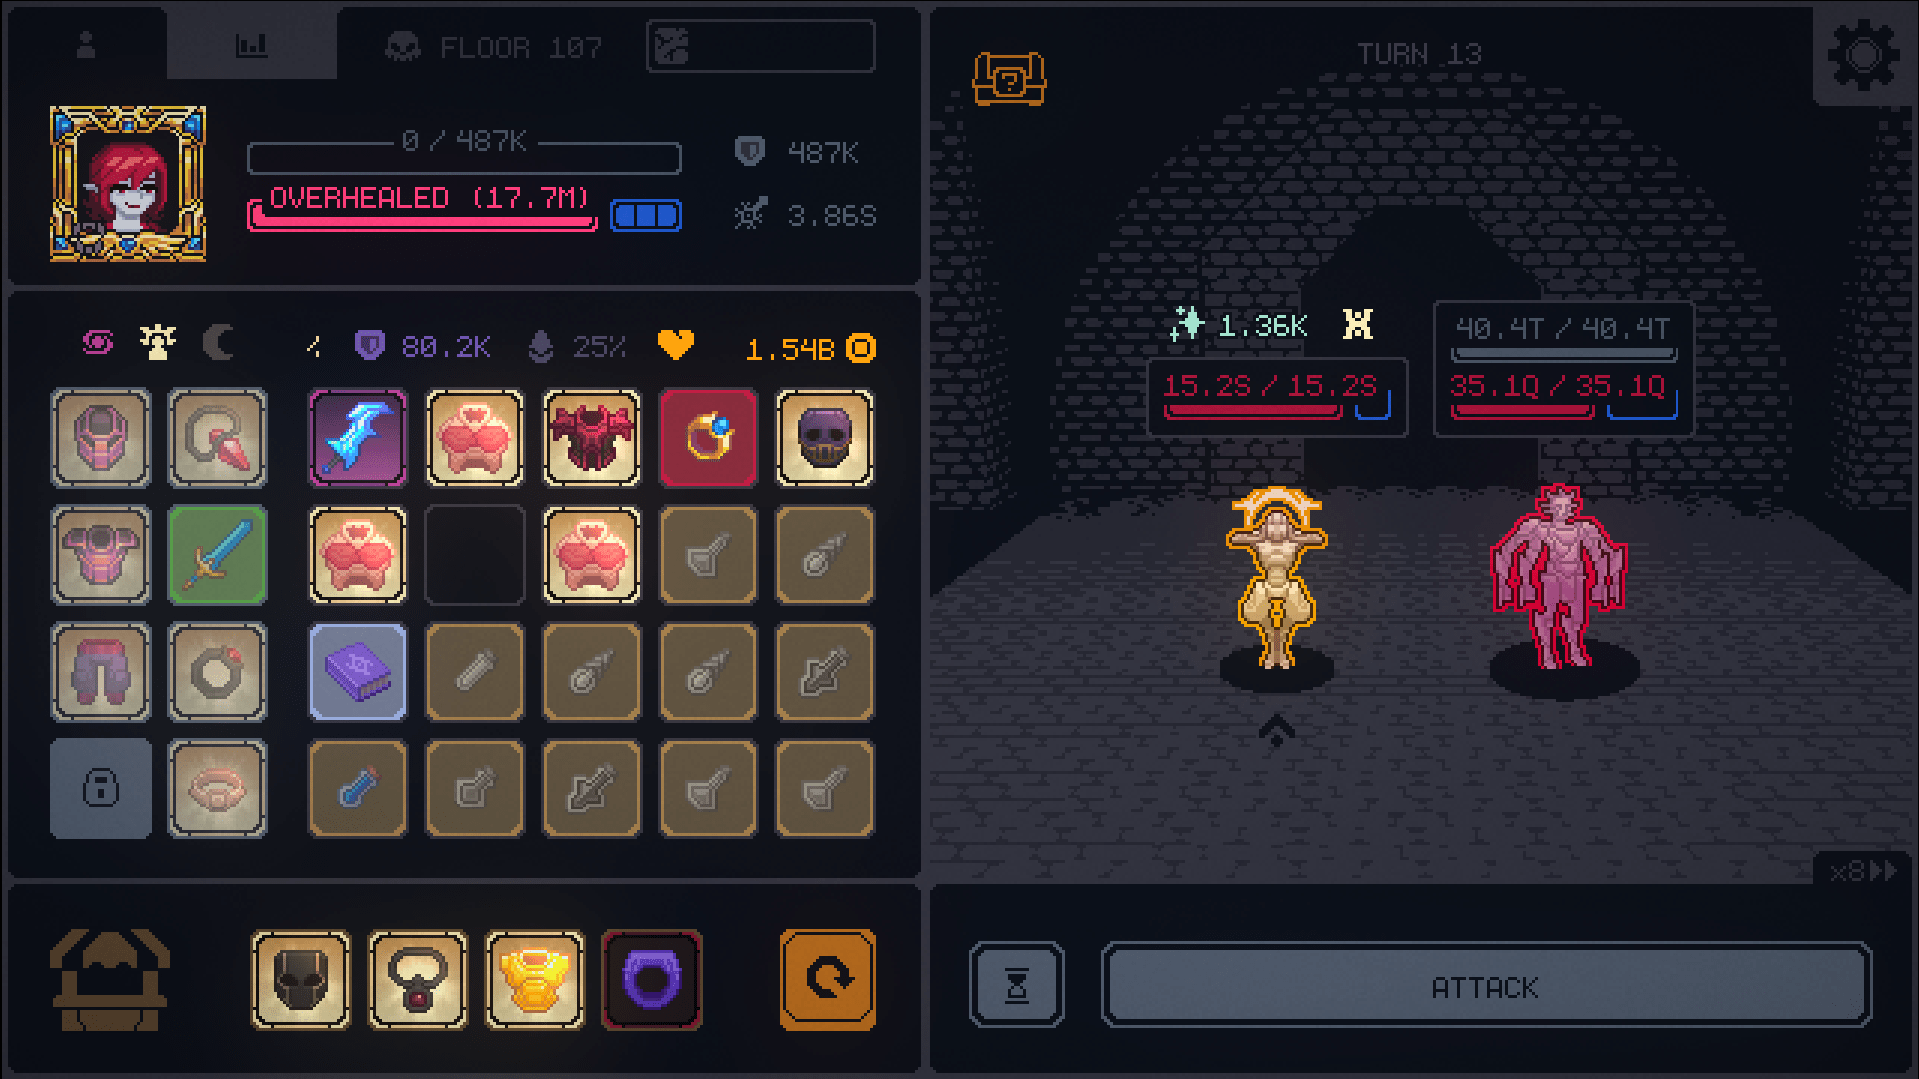
Note that this is a floor “107+” run because I ran into the enemy damage glitch three different times on floor 107 after forcing a backup reload. I don’t know how to get past it, but even at floor 107 I was in absolutely no danger of my run ending any time soon.
For talent spec, I recommend this path. None of Elys’s specs are particularly good, but Vampiercer is probably the best. It would be great if the spec carried your penetration rating on its own, but it can’t unless you heal and you can’t heal unless you damage health, and you can’t damage health past armor unless you…. already have penetration.
Still, Vampiercer is nice in the endgame when you already have 100% Penetration and can sneak in some damage in on Iron Golems, but then Vampiercer triggers and their 75% toughness doesn’t matter anymore.
Definitely take the Swarm Challenge, but leave the Honor Challenge off. (I recommend this for every run).

Early Game
Suit up in Ancient Ice set as soon as you can and make the change to Freeze attack when you can. The armor and high damage just from that set will carry you pretty easily for a while.
Equip Celestial right away as soon as you see it, since its armor scaling is excellent and it will make your damage skyrocket.
Bide your time until you get good potions and tomes. You definitely want Holy Water, Demonic Blood, Moonflower Extract, and Zephyron’s Tome.

Mid Game
Celestial and Ancient Ice sets buy you plenty of time in your dismantle rotation, and you’ll be pretty far ahead of everything when it comes to damage and defense. If you feel yourself lagging, push hard to upgrade your Celestial pieces and consider dismantling some freeze atk% and elemental power% to tide you over.
Use this freedom in your dismantle rotation to start working on the combo described in the first post. You’ll need some malice damage, some lifesteal, and lots of hp/hp%.
You can probably start trying to swap over to the combo right around floor 25.
- For Kotyas – Just target them and Silence them. This is my favorite way of handling Kotyas, since they seldom appear in multiples (and when they do, they’re not threatening–you can just pass).
- For Jupiters – Pantaloons give you precision, and equip a Shadow weapon if you still need more. Once you get a Moonflower Extract, forget about ’em.
- For Saturns – Just kill them.
- For Iron Golems – Just kill them… for now. They’ll be a problem later.
- For Magma Golems – I actually equipped Elemental Necklace until around floor 60 and let Elemental Resistance tank these. That said, I was just trying to see if I could do a run without agility, and I eventually just ended up equipping Coward’s Ring anyways because, fittingly, I’m a coward.
- For Suns – Moonflower Extract.

Midgame with the Combo Online
Pull the trigger when you feel like you have all the combo elements together! Friendly suggestion though, don’t sell your old gear until you know it works!
Some notes on gear here:
- It’s probably correct to equip Shard of Power and Coward’s Ring here instead of Elemental Necklace and Giant’s Ring. You’re gonna have to do it eventually anyways, so you might as well do it now.
- Orion set? Sure, why not! It’s not a critical part of the combo, but that first boost of armor converting to overheal can super accelerate your damage output.
- If you don’t want to use Shard/Coward yet, just make sure you have penetration equipped somewhere or else you won’t be able to deal damage to hp and trigger a lifesteal.
- Important – You want to make sure your freeze attack is your highest attack type! Don’t equip a huge beefy physical sword or else you’ll lose a big chunk of your damage multipliers. Just leave your weapon at lower rarity.
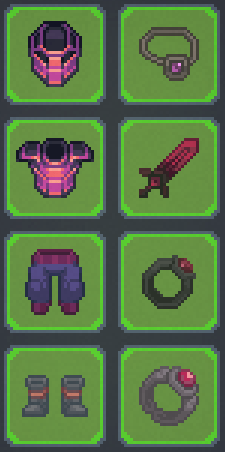
Endgame
Once you hit 60, you gotta find room for a non-negotiable Excalibur. If you’re not dealing damage to health, you’re dying, so you must break damage immunity shields.
As Iron Golem armor skyrockets, Shard of Power becomes mandatory. And if you have to equip Shard of Power on your neck, that means you can’t use Elemental Necklace to stay Ele Resist% capped, and that means you’ll die to Magma Golems. So, yep, you guessed it: you’re now forced to equip Coward’s Ring to be agility capped like literally every other build in this half-baked version of the game.
Some notes:
That’s not a mistake! You just don’t get to wear anything on your feet because there are no generic shoes and none of your equipped sets have shoes. Hence the nickname for this build, Shoeless Shadow Combo.
You can upgrade Excalibur if you want to, but it’s not necessary. Even if your physical attack takes the lead somehow, Celestial set changes those calculations in real time so you’ll automatically swap over.
Using Potion Toxicity – Potion Toxicity is the new interaction where, if you drink more than 5 potions in a fight, you get a stack of a debuff that deals damage to you at the start of the round based on a percent of your max health. That’s fantastic for us, so drink all the potions you want! That damage does trigger Celestial set, and you can heal it back to trigger Vampiric set. This is super helpful in fights where enemies like Saturns aren’t hitting you much but you still need damage buffs to whittle them down. I would regularly stack up to 25% blackrot, and not even because I needed the potions.

Dismantles
Core stats to dismantle for are hp, hp%, freeze atk, freeze atk%.
Secondary stats to dismantle for are overheal, overheal%, faith%.
Finally, Malice, Lifesteal%, and/or Healing Power% are important to the combo. Just make sure you have enough of these to self-heal the damage as it comes in. You should also dismantle one dazzle item at some point–you don’t need the armor, but you’ll get ephemeral locked at some point and cleansing that debuff will allow you to benefit from your Faith% for yet another insanely good scaling multiplier for all your damage.
Don’t be afraid to dismantle higher-rarity rando items that have health on them, even if they’re not the best in slot for that item. Items like Ring of Recovery and Living Boots are perfectly reasonable and can be a lot better than lower-rarity Living Chest and even Throngler.



Be the first to comment