
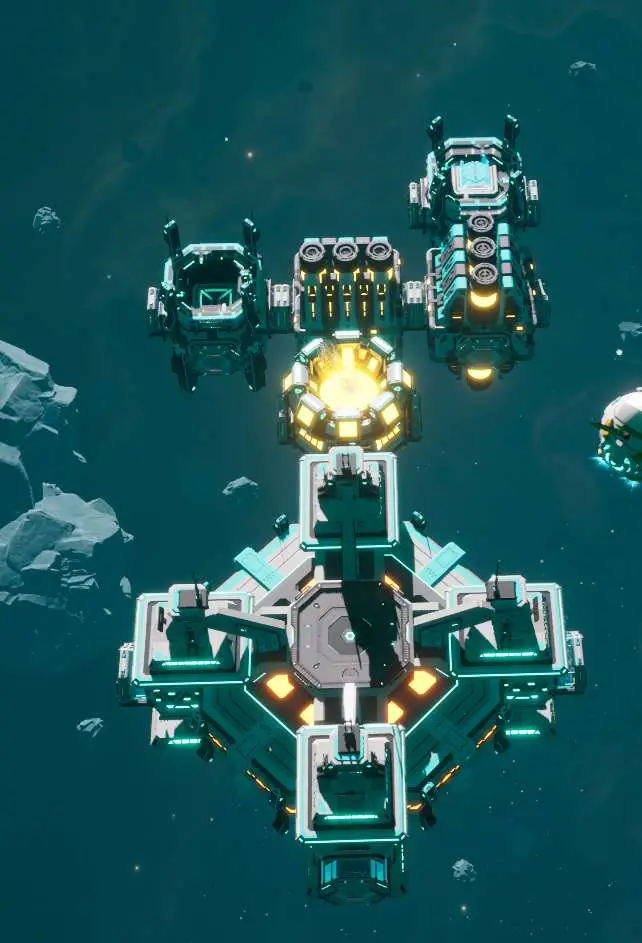
Station Construction Basics
Ву Eruannon.
Getting Started: Basic Hardware
Before designing layouts, you need to build some essential hardware. The minimum required items are:
- 1 Atomizer
- 1 Smelter
- 2 Matter Printers
- 1 Storage unit
These items let you build a small factory for making hull parts and frames. You’ll need these components for building more storage, connectors, and basic processing machines.
After getting this initial setup running, you can think about more complex designs. First, let’s cover some basic principles.
Logistics Concepts
Throughput
The first thing to understand is throughput. Each building has two relevant speeds:
- Input Speed: How quickly it can receive items from other buildings. This seems to have no upper limit.
- Output Speed: How quickly it can automatically send items out. This is limited by the building type and its upgrade level.
This output limit is usually the main bottleneck to consider when planning layouts. It means a producer (like a smelter) might only hit its theoretical maximum production rate if the destination storage is full. Otherwise, the building’s limited output speed controls how fast items move, unless the production rate itself is even lower. A good example is Water output from a Refinery.
Also, it seems floor tiles themselves don’t limit how many items can pass over them. Items move as fast as the sending building can push them out. Because of this, we’ll mainly use the output speed of Storage buildings as the standard reference point for designing layouts.
Transfer Time
Items need time to travel across your station. This isn’t a big deal if you have a constant supply, but that’s often not the case. Longer distances can lead to delays in production, requiring larger storage buffers to keep things running, especially when waiting for infrequent deliveries (like from freighters).
For the layouts described here, we’ll manage this by using small buffer storages, typically set to hold only one stack of an item. If you find one stack isn’t enough, using two stacks should cover most needs. This leads to the concept of buffers.
Buffer
A buffer is simply the amount of items held in storage units placed between production buildings. These buffers serve a few functions:
- They help distribute resources locally, reducing the need for machines to request items from far across the station.
- They reduce the waiting time for production to restart after a machine’s output storage fills up and then empties again.
- They provide temporary storage to smooth out fluctuations in supply or demand.
- As a side effect, if a buffer keeps running empty, it clearly shows a shortage in your production chain for that item.
Goods Distribution
The game distributes items using a priority system combined with rotation.
- A storage set to a higher priority will always receive items before any storage with a lower priority.
- Among storages with the same priority, the game tries to distribute items evenly between them (round-robin).
We can use this later, for instance, to create an overflow for unwanted byproducts (like Carbon from water refining) and send them into the network without blocking needed items.
Logistics System Parts
Now, let’s build the core parts of our logistics system. The goals are:
- Reduce item travel time.
- Balance resources between different production areas.
- Keep the setup simple.
- Make it easy to copy and paste sections (modular).
- Allow for easy expansion.
Because item stacks are large and building output speeds are often limited, we won’t use many extra buffer modules beyond the specific storage types described below. We’ll create a set of standard templates or “modules” that can be copied and pasted. Copying preserves connection settings, which is very useful.
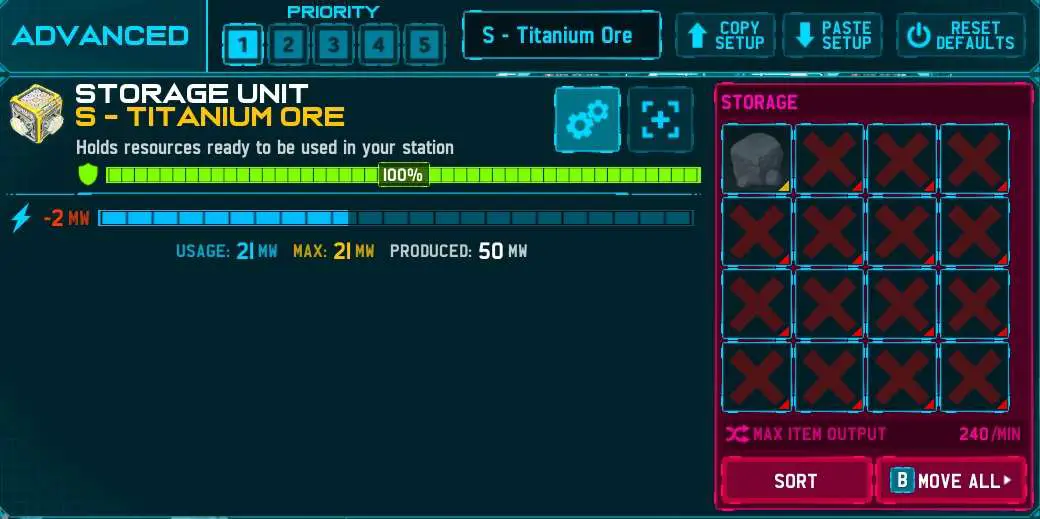
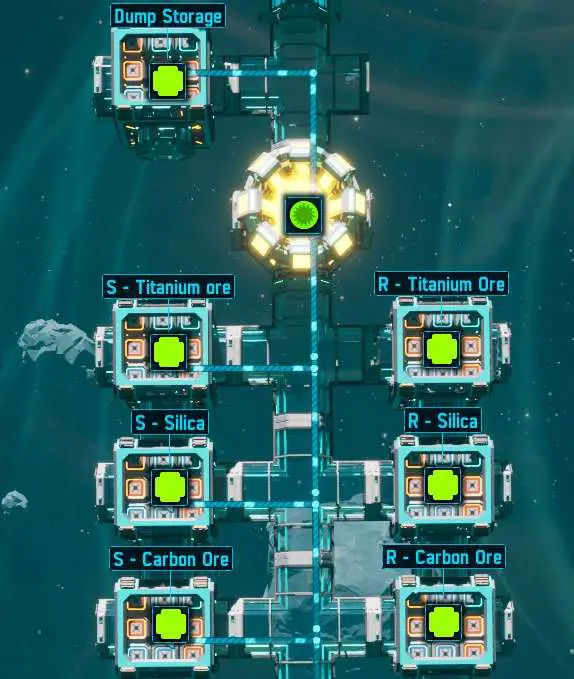
S – Supply Storage
- Purpose: To supply a specific item to the logistics network. Think of it as a provider.
- Setup: Use one storage slot for each item type (including ores).
- Connection: Connect from an S-type storage to an R-type storage for the same item.
- Usage: You’ll need one S-type template for each item you want transported. Keep these templates organized in one area.
(Layout Description: A basic storage unit setup, intended to send items out)
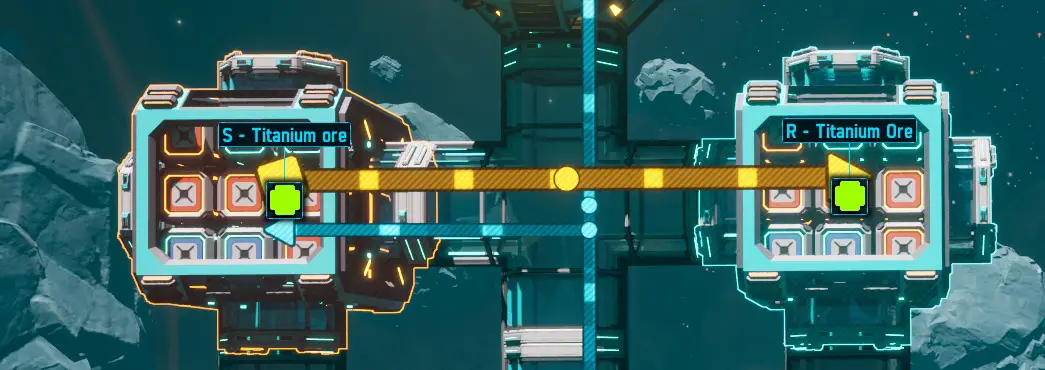
R – Request Storage
- Purpose: To request and receive a specific item from the logistics network for use by nearby machines. Think of it as a requester.
- Setup: Use one storage slot for each item type. The basic layout is the same as the S-type.
- Connection: When first placing an R-type template, do not connect it to anything yet. It receives items via its connection from an S-type storage.
- Usage: Place these near machines that need the specific item. R-type templates in your palette area can also function as a manual pick-up point for items (like an “item mall”). You can connect an Atomizer directly to an R-type storage for ores if needed.
(Layout Description: A basic storage unit setup, intended to receive items)

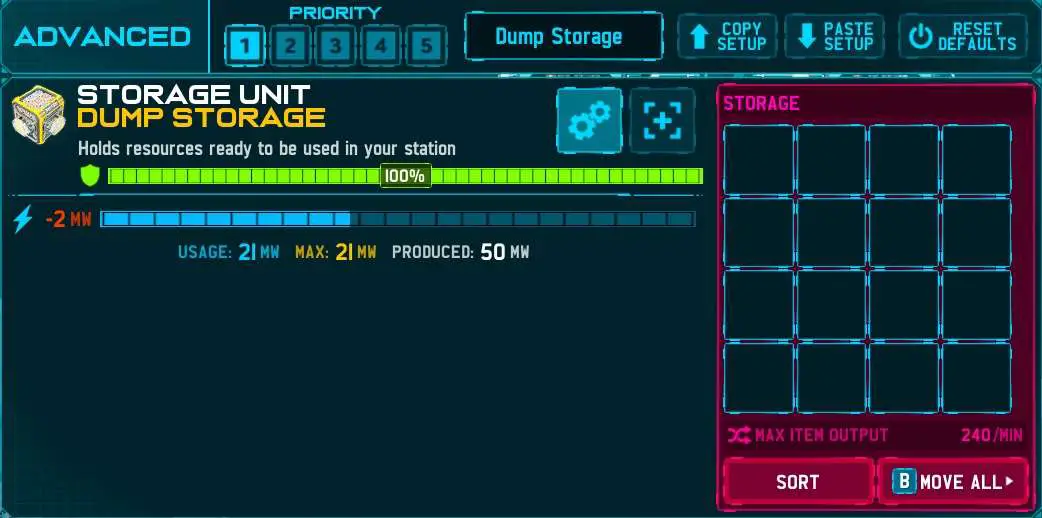
Dumping Storage
- Purpose: A central place to drop off any miscellaneous items you have. It acts as a sorting system.
- Setup: Usually just one of these for the whole base.
- Connection: Connect the Dump storage to all the S-type storage templates in your palette area. Every time you add a new S-type template for a new item, connect the Dump storage to it as well.
- Usage: When you drop items here, they get distributed to the appropriate S-type storage in the palette, which then feeds them into the network.
(Layout Description: A storage unit setup designed to receive various items and distribute them to specific S-type storages)
How to Use Them (Examples)
Once you have your S, R, and Dump storage templates set up (your “palette”), you can build production areas:
- Copy S-Type: Copy the S-type template for the item your machine will produce. Place it where you want the production output to go.
- Copy R-Type: Copy the R-type template for each item your machine needs as input. Place these near the S-type storage.
- Build & Connect Machine: Build the actual production machine(s) near the placed S and R storages. Connect the machine’s input(s) to the corresponding R storage(s) and the machine’s output to the S storage.
- Copy Module: You can now select and copy this entire group (machine(s) + local S/R storages) to create more identical production units. The machines within the unit should only be connected to their local S and R storages.
(Example Description 1: A single machine connected to one R-type input storage and one S-type output storage)
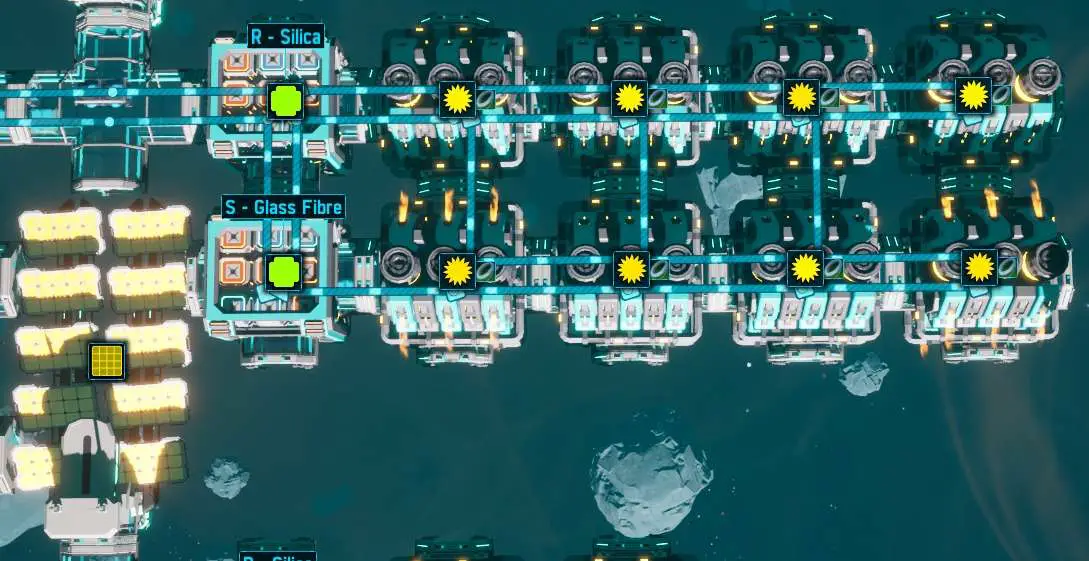
You can use the same method for machines needing multiple inputs:
(Example Description 2: A machine connected to multiple R-type input storages and one S-type output storage)
You can also arrange the storages to define the boundary of a production area:
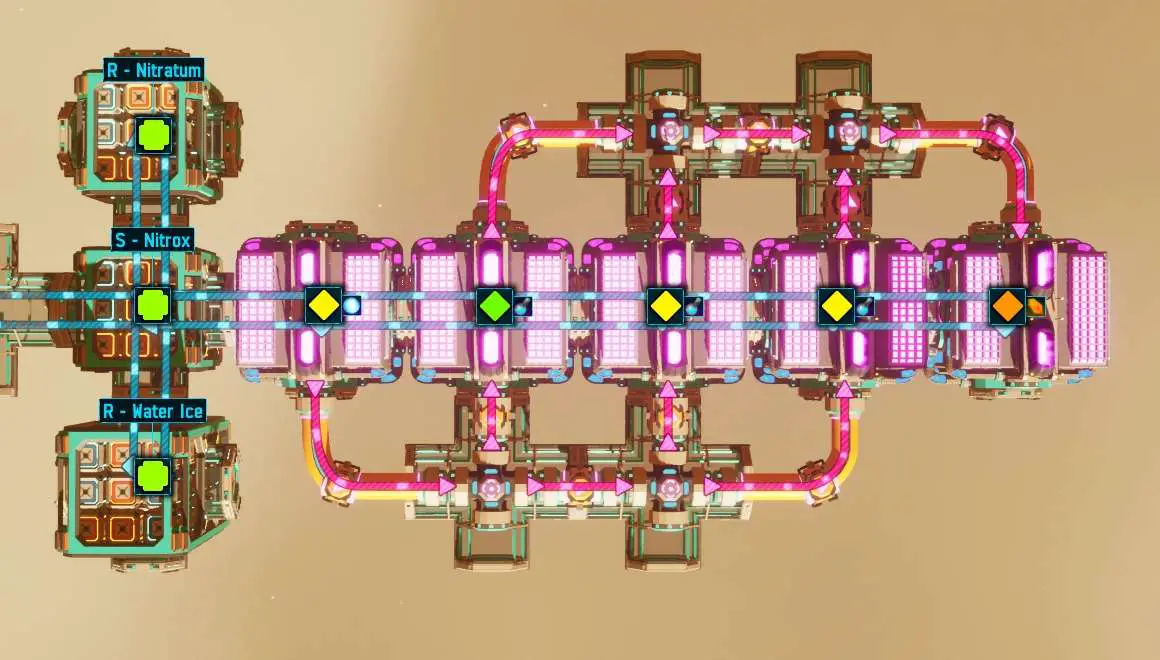
(Example Description 3: A Nitrox processing setup where S and R storages form a border around the machines)
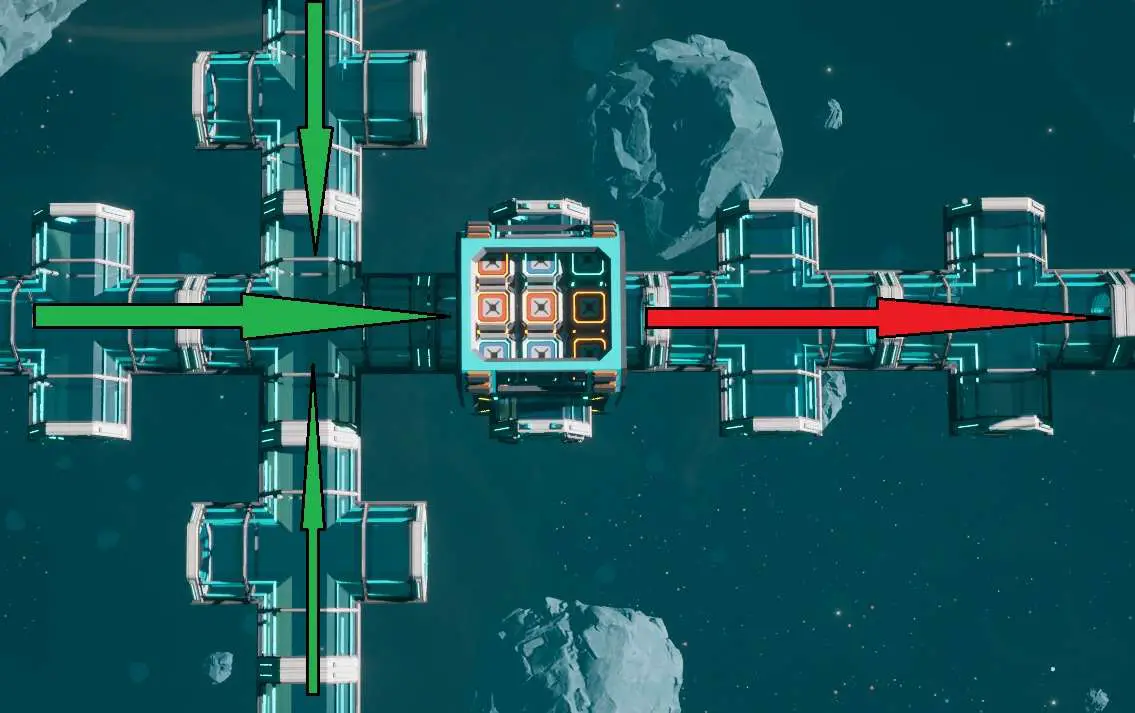
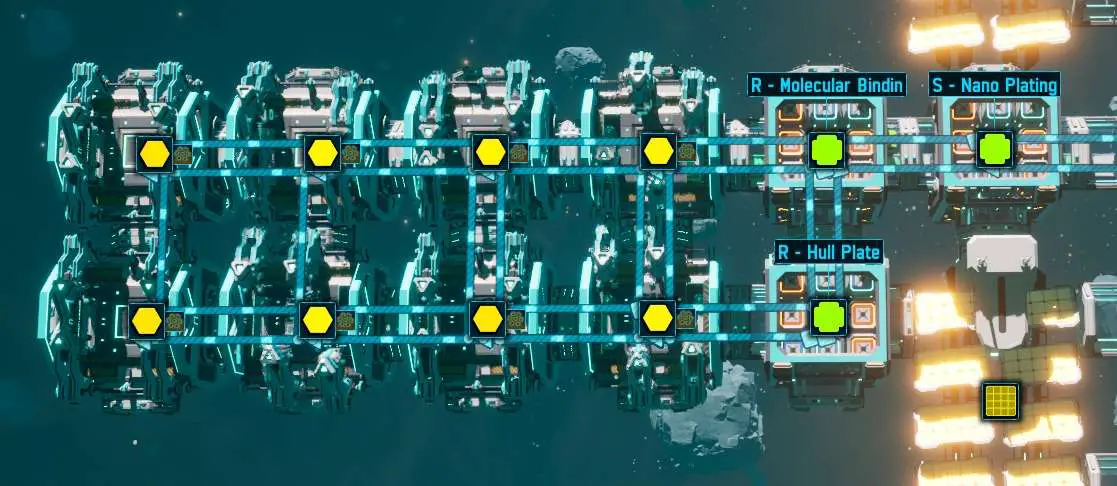
Grid and Module Size
Consider standardizing the size of your production modules (e.g., 2×7 tiles, 3×7 tiles). This isn’t required, but it helps with organization, planning connections, and allows the base to expand more neatly in all directions.
- A 3×7 size fits the Nitrox layout shown earlier.
- A 2×7 size can hold 5 pairs of smelters (around 300 resources/min output). This might not max out Mk II smelters but works well.
- Maybe 2×8 or 3×8 sizes work better for matching Mk II storage output limits.
Using standard sizes is mainly for organization and looks; the core logistics system works without it, as long as you respect building throughput limits.
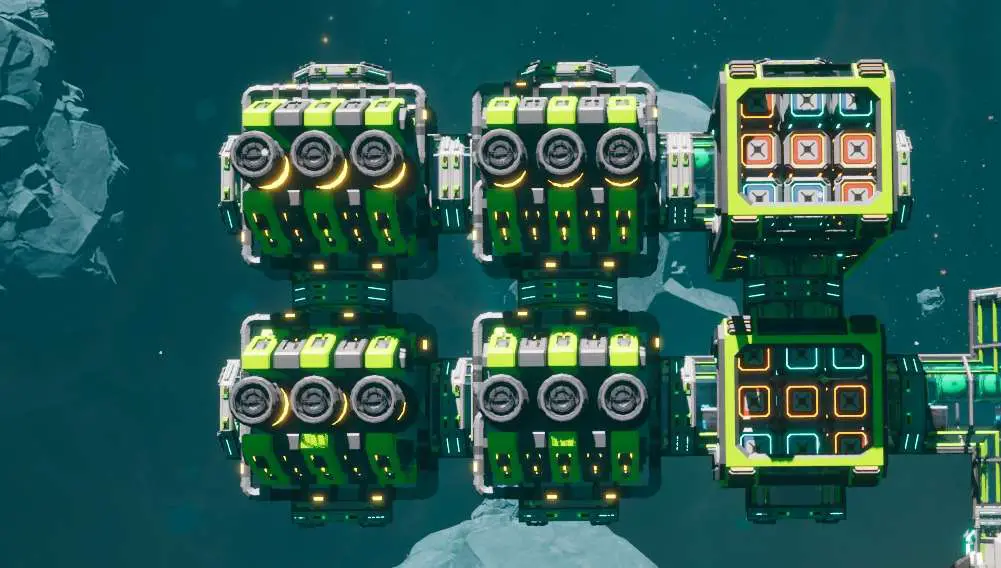
Important: Don’t build more production machines in a module than the connected output (S-type) storage can handle per minute. Molecular Binding is a good example – it produces more items than it consumes, so its layout needs to account for the storage output limit.
(Example Description 4: A Molecular Binding layout designed to work within Mk II storage output limits)
Handling Freighters
Connecting freighter docks directly for every single resource can be tedious. A simpler approach is to use S-type storage modules for incoming ores. Connect the freighter dock directly to these S-type ore storages.
(Example Description 5: Freighter dock connected to an S-type storage module specifically for ores)

Additional Tips
- Artifact Queuing: Artifact Analyzers can queue artifacts. If you add more while one is researching, it will start the next one automatically when finished.
- Auto-Repair: Researching automatic repair, even just level 1, is useful and relatively cheap early on.
- Simple Mining Outpost: A basic remote mining setup needs: 1 Miner, 2 Solar Panels, 1 Battery (for backup), 1 Turret, and 1 Freighter Dock.
- Power Transition: Keep your base relatively compact before switching to Fusion power. Solar panel output drops off noticeably as the base grows.
- Production vs. Use: Just because a machine can produce a large amount of a resource (like water with fusion power) doesn’t mean you need to use it all immediately. Plan storage accordingly.
- Storage Limits: Some recipes might need Mk II storage (or multiple Mk I units) to handle their maximum potential output. You don’t have to run them at full capacity if you don’t need that many items.
- Station Layers: Remember your station has two vertical layers. Use both to shorten item travel distances. Press the ` key (backtick) to toggle the visibility of the top layer.
Be the first to comment